|
| |
|
| |
|

|
Immortal Wombat
|
 |
in perpetuity
Dec 2000
time: 05:15
|
|
quote:
Originally posted by Harlan
As I said to Martin in an email, I tried using this program in an email, but I still don't get how it works. My goal is to create a new terrain type, Forest Hill, but adding Forest graphics to Hills (while keeping a regular Hill). I can do the graphic part in Photoshop, but could someone then help me do the conversion part to make it actually work in CTP? |
Hmm, seems no-one wants to answer you 
Unless you want to replace tile graphics (ie your scenario doesn't use polar hills or something) then you have to export the whole lot as a script file and targa images. You will get something like a file called test.scr and a directory called test with all the tile, border, river and tileimp images in it.
Then you dump your images into the directory as well, and edit the script file to make TileEdit recognise them when you import the script.
I don't know exactly what you need to edit in the script file, but it shouldn't be too hard to figure out using the script-file-format file included.
Each land terrain you add needs 15 tiles (you can copy-and-paste the tile rules from some other terrain) and then it needs 15 borders. (1 for each other terrain type and one for beach) then you need to add a border to every other terrain type for where they meet the new terrain.
To make the new terrain in a scenario, just use the cheat menu, to add it on. To make it appear in a random map, I don't know how you can, sorry.
Hope this helps.
Ben
|
|
| |
|
|
|
Martin Gühmann
|
 |
Berlin, Germany
Mar 2001
time: 06:15
|
|
OK Harlan here is my second trial to explain how I added purple hills:
I will start with the exporting of tile graphics:
At first we go to all hill graphics. The first one of green hill has the Tile Number 8, Tile Index 9, TilesetIndex 9 and four cut out borders you see the 15 in the Show Tiles box.
Now we want to save this graphic to an image that can be modified in an external paint program. Therefore we go on File -> Save... -> Tile... and save the image. We repeat the same thing with the other images of green hills.
Here is the list of Tile Number, Index, TilesetIndex and Border numbers:
Number-----Index-------TilesetIndex------Borders
8-------------9-------------9-------------------15
83-----------901----------9-------------------15
84-----------902----------9-------------------15
85-----------903----------9-------------------11
86-----------904----------9-------------------12
87-----------905----------9-------------------3
88-----------906----------9-------------------14
89-----------951----------9-------------------14
90-----------952----------9-------------------6
91-----------953----------9-------------------7
92-----------999----------9-------------------0
In Paint Shop Pro I collorized them. And then I imported them into my gtset565.til file.
At first I went to the position where I want to add the Tile graphics. As I wanted to add a new terrain type and I wanted to add it according to the allready existing onces that can be found in the CTP2 *.til files therefore I went to the position (TileNumber) 26. That's the position after the first special2 terrain tile the dessert pics and the position, before the rest of all plains tiles.
Now if your at these position go on Edit -> Add -> Tile...
And now your are in the add a tile box. In the upper left corner you see the Position box. It shows the current tile position. Of course you can change this position it should be now position 26 if your modifying the original version of the gtset565.til file. If you are modifying my gtset565.til file than it is position 27.
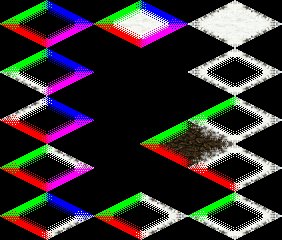
In the upper right corner you see a cross of red, green, blue, pink and black sqaures.
To load a graphic into Tile Edit go on load.
Now search for your modified tile images and load the first one. If you didn't changed the name for the image than it's called Tile0900.tga. Select this graphic if you didn't modified the brackgound color than it is silver select silver for transparent color or click on the background with a left click and CTRL. Now press OK and if you selected the tranparenty color correctly you see instead of the black square your modified graphics.
You can see that it has four cutout borders. Therefore the red, green, blue and pink squares contains checkboxes. Click on that checkbox and it gets a X. That must be done for every cut out border.
Now on the left side in this box there are two other little boxes one for Tile ID and one for Tile Index.
For Purple Hills I selected 27 for Tile ID and for Tile Index also 27. Tile Index is the TilesetIndex used inthe CTP2 terrain.txt. And Tile Index is the internal number for that graphics.
Afterwards I added the rest of my new graphics at the end of the tiles. Here is the list for my modified Tile images I didn't changed the names.
Number-----Index-------TilesetIndex------Borders
26-------------27-------------27-------------------15
311-----------2701----------27-------------------15
312-----------2702----------27-------------------15
313-----------2703----------27-------------------11
314-----------2704----------27-------------------12
315-----------2705----------27-------------------3
316-----------2706----------27-------------------14
317-----------2751----------27-------------------14
318-----------2752----------27-------------------6
319-----------2753----------27-------------------7
320-----------2799----------27-------------------0
You noticed that the last Indices in both lists ends on **99. In CTP2 that is the image that covers the cutout borders if there are no according cutout borders.
Now you have the tiles and now you need border tiles to make a the transition between different terrain types smooth. Therefore activate Show Tile Borders. The Border ID shows you two numbers. The first number is the number for the TilesetIndex of the tile inside and the second number is for the tile outside.
For Purple Hills I had to make new border graphics but maybe it is not neccessary for your purpurse to draw new border tiles but you need some therefore you should save these border. Now all Borders conected to the Hill terrain are interesting. Therefore we save every border tile that has in its border ID the TilesetIndex for Hills that is 9. We save both kinds of borders for hills, inside and outside as well.
To do that go on File -> Save... -> Borders... and save the borders.
Now the border tiles can be modified in a paint program. For now I hope you don't need to modify them for your purpose.
If you need to modify the borders now you only modify one site and can them mirror the missing ones.
To load borders go on Edit -> Add... -> Borders... For the position I added my Borders inside Purple Hills after the last border in the *.til file. I added the outside borders to the according borders group.
Now you have to load in a border tile of coarse you have to know which terrain is inside and which is outside in TilesetIndices. Afterwards you described the inner and outer TilesetIndices you can load the border in.
After the borders are done you have to add new Tile Rhules. Otherwise you will see only two tile graphics for your new terrain.
Here is the pattern of such a 3x3 matrix:
NW N NE
W C E
SW S SE
Here are the tile rhules that I found for Green Hills:
Position: 32
-1 -1 -1
-1 9 -1
13 -1 13
Graph: 952 Alt1: -1 Alt2: -1 Alt3: -1 Alt4: -1 Alt5: -1
Now in this example the graphic 951 is used if we have in the center a Green Hill tile and in the SouthWest and SouthEast a Beach Tile. The Beach terrain has in CTP1 the TilesetIndex 13. And the first list contains a graphic called 951 at position 89.
Now the other rhules:
Position: 33
-1 -1 -1
-1 9 -1
13 -1 -1
Graph: 951 Alt1: -1 Alt2: -1 Alt3: -1 Alt4: -1 Alt5: -1
Position: 34
-1 -1 -1
-1 9 -1
-1 -1 13
Graph: 953 Alt1: -1 Alt2: -1 Alt3: -1 Alt4: -1 Alt5: -1
Position: 35
-1 -1 -1
-1 9 -1
19 -1 19
Graph: 952 Alt1: -1 Alt2: -1 Alt3: -1 Alt4: -1 Alt5: -1
Position: 36
-1 -1 -1
-1 9 -1
19 -1 -1
Graph: 951 Alt1: -1 Alt2: -1 Alt3: -1 Alt4: -1 Alt5: -1
Position: 37
-1 -1 -1
-1 9 -1
-1 -1 19
Graph: 953 Alt1: -1 Alt2: -1 Alt3: -1 Alt4: -1 Alt5: -1
Position: 38
9 -1 9
-1 9 -1
9 -1 9
Graph: -1 Alt1: 9 Alt2: 901 Alt3: 9 Alt4: 902 Alt5: 9
That is the last tile rhule for Green Hills. It is different to the first ones. Now it uses alternative graphics that means different graphics can be used for the center location if the rhule fits. If you put a valid graphics to the Graph position (a valid number from the internal Tile Indices) Than the Alt graphics are ignored, therefore a -1.
For my Purple Hill terrain I coppied these rhules and replaced the nines in them by 27. I added my new rhules after the last rhule in the *.til file, of course it is possible to add the rhules somewhere in the rhules block. But for me the file should look as Activision made it.
To add tile rhules go on Edit -> Add... -> Tile Rhule.
Now you are in the add a border box on left side you can make the tile rhules and on the right side you can select the center graphic for your tile.
The rhombus of boxes discribes the 3x3 matrix above:
N
NW NE
W C E
SW SE
S
There you can put the neighbour TilesetIndices in.
Here is the first new rhule for my Purple Hill terrain:
Position: 32
-1 -1 -1
-1 27 -1
13 -1 13
Graph: 952 Alt1: -1 Alt2: -1 Alt3: -1 Alt4: -1 Alt5: -1
Now the are some images that are not covered by the Tile Rhules so far as I now they are connected with the internal terrain type found in the terrain.txt and the last block.
-Martin
PS: The attachment contains this post.
 Attachment: tilmod.txt Attachment: tilmod.txt
This has been downloaded 16 time(s).
|
|
| |
|
|
|
Immortal Wombat
|
|
in perpetuity
Dec 2000
time: 05:15
|
|
Martin,
I'm having a bit of trouble adding new tile improvements...
I added 16 new TIs, then exported the script, added in the ImprovementIDs manually (to avoid a Out Of Range (58) error  ) and then reloaded the script into TileEdit, and saved the tile file. ) and then reloaded the script into TileEdit, and saved the tile file.
Whenever I lay tile the custom 16 tile improvements from the map editor however, the TIs appear as roads, not the ones I want. I don't know what's going on. Originally I had the IDs set to high numbers, above the upper range, so I tried filling in the gaps left, using numbers 38-49, 51, 63, 65 but these didn't work either.
Any ideas?
|
|
| |
|
| |
|
|
|
Immortal Wombat
|
|
in perpetuity
Dec 2000
time: 05:15
|
|
I was editing the CtP2 default gtset555.til file. I added 16 tile improvements:
Made the graphics, went add->TI->load->OK making them all 94*72, the normal size, just in case of other complications. I put them all in the right position, but forgot the IDs, so I couldn't get them in the game at all. So I went back to edit the TIs,
edit->TIs->Chnage the ID to desired value->OK
This worked for the first two, up to ID #170, at which point, it gave (gives indeed) me the message "List Index Out Of Bounds (58)"
I can still edit this by importing an altered script, but not in TileEdit. The thing is, #167-169 don't appear either so that isn't (directly at least) what's causing the problem of them not being available in the game. 
|
|
| |
|
| |
|
|
|
Pedrunn
|
 |
of Natal, Brazil
Jul 2001
time: 02:15
|
|
So far just the plain black tile.
Later (if it works out and i do start it), white dots (stars) and some others stuffs (planets or bigger stars) will be welcome.
But just the Black tile is great for now (until i have a beta done).
Thanks
Last edited by Pedrunn on 01-03-2002 at 04:22
|
|
| |
All times are GMT. The time now is 05:15.
Apolyton Time is 00:15. |
top of page
|
|
|
Forum Rules:
You may not post new threads
You may not post replies
You may not post attachments
You may not edit your posts
|
HTML code is ON
vB code is ON
Smilies are ON
[IMG] code is ON
|
|
|
|
|
|






 05-09-2001 12:00


 Mark but I do post updates whenever I find something in my programs that needs fixing


 Attachment:

 Could you explain it a bit more, like what tile-file you are modifying, the index and ID's you use, etc. (don't want to leave any seriouse bugs in there you know
  )
) : I se it now (didn't go that high in my own tests), that looks odd, I'll have to look into the code to find an explanation and to fix it.


 |
|